I live on a farm and the iconic rural mailbox has been part of my life forever. When I first got married it was the only link to my family. Back then, there was no email or texting or cell phones. Long distance calls were way too expensive for a daily chat with mom and dad. So, the good old mailbox is a symbol of connection for me.
Truthfully, when I purchased this set, it was the stamp with the image of the mailbox that caught my eye. I didn’t even realize that there were stand alone dies to create a different mailbox. The possibilities are endless with this stamp and die combo. I did a trio of cards and decided that I had to do a video showcasing the three ways that I used the bundle. I’ll be sharing both the original cards that I created and the variations of them that I did on the Sending Love Bundle Video, over the next few days.
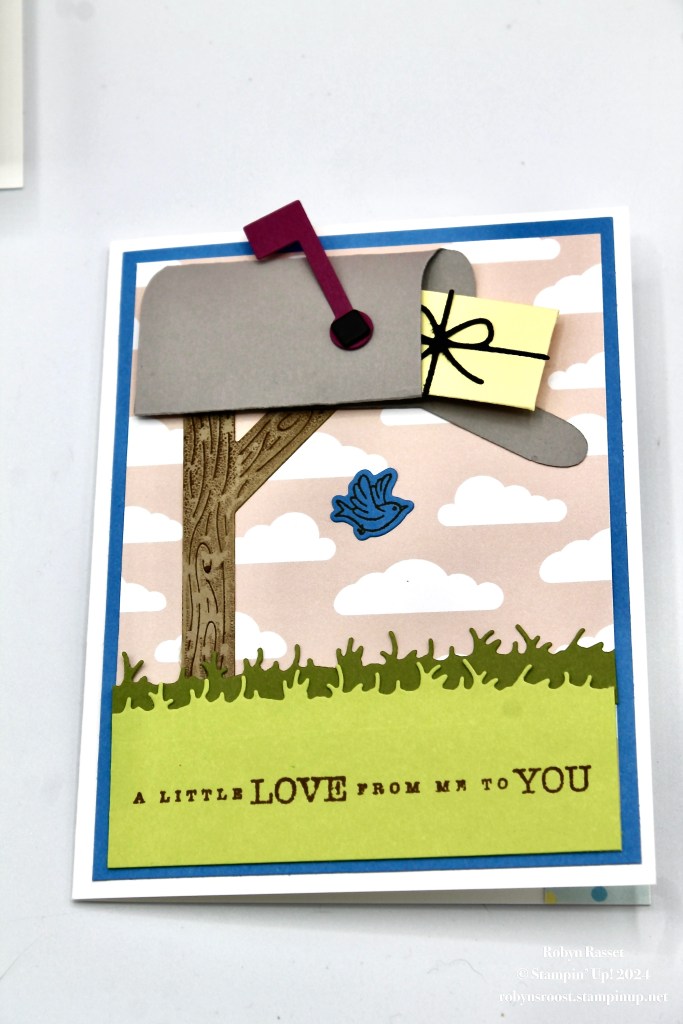
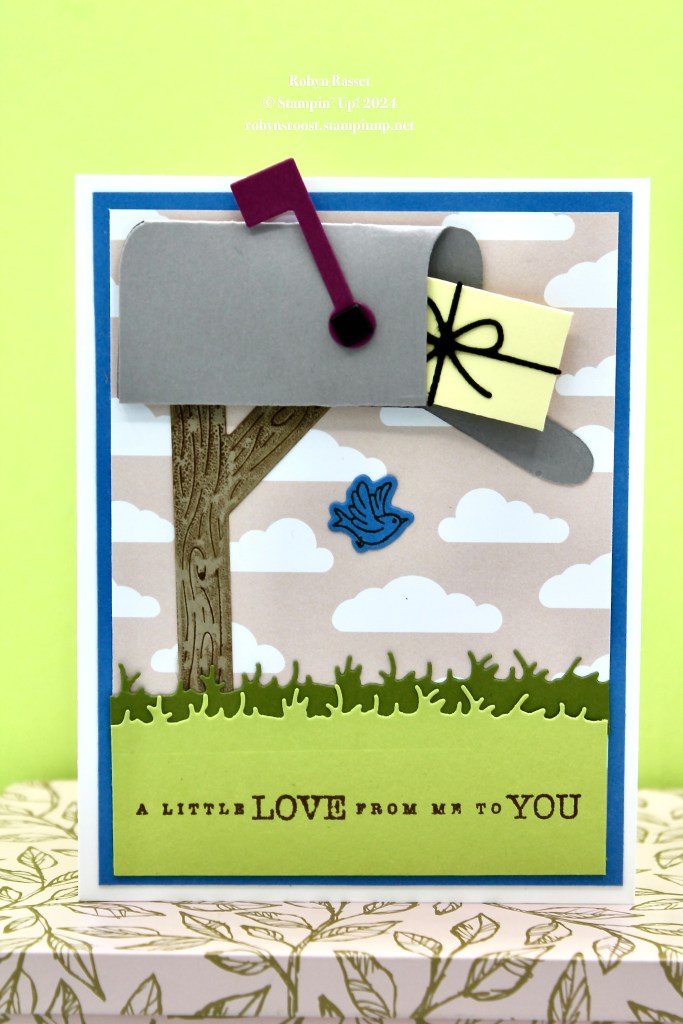
For my first card, I used a Blending Brush to ink the post die, to give the post a more realistic look. It’s done on Crumb Cake paper with Pecan Pie ink. The mailbox is die cut from Gray Granite. I just have to say that this is a REALLY COOL die! It creates an actual box! Tips: make sure that you use a bone folder to sharpen the creases, especially the little gluing tab, so that it stays flat. I used Tear and Tape adhesive. The pink clouds are a piece of the Lighter Than Air Designer Series Paper. The envelope is another die that has score lines and creates an actual envelope. If you wanted, the top could be left open and a little note inserted.
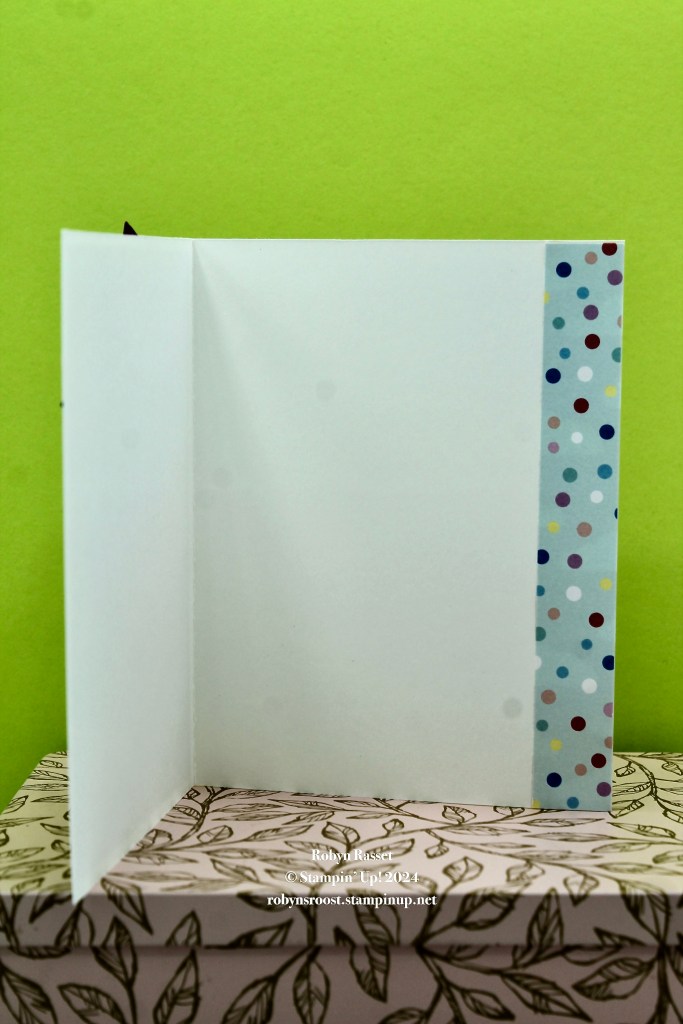
For the inside of this card, I used a leftover strip of the Lighter Than Air DSP. I haven’t added a greeting to these cards yet, they may become Valentine’s.
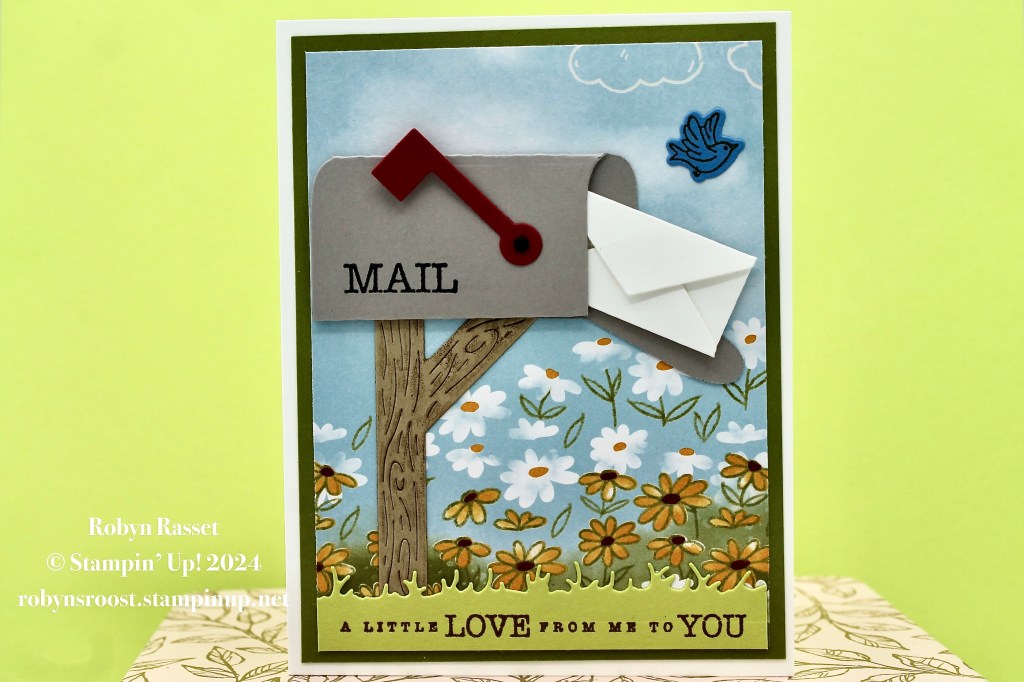
Here is the card that I did on the video. It has a piece of the Rain or Shine Designer Series Paper for a background. You can see how the envelope in the mailbox folds on this card. I left off the bow die cut so that the folded envelope showed. The flag attaches with a brad and will actually raise and lower. Did you notice the layers of green on the bottom of the cards? The die cuts the grass sprigs only. Not the bottom or the ends, which gives lots of opportunity to use it in different ways. Make a longer piece, or by using different widths of paper, more or less grass.

Wouldn’t it be really cool to stamp the house number on the mailbox? I know that I have some tiny numbers in a photopolymer set back in Minnesota.
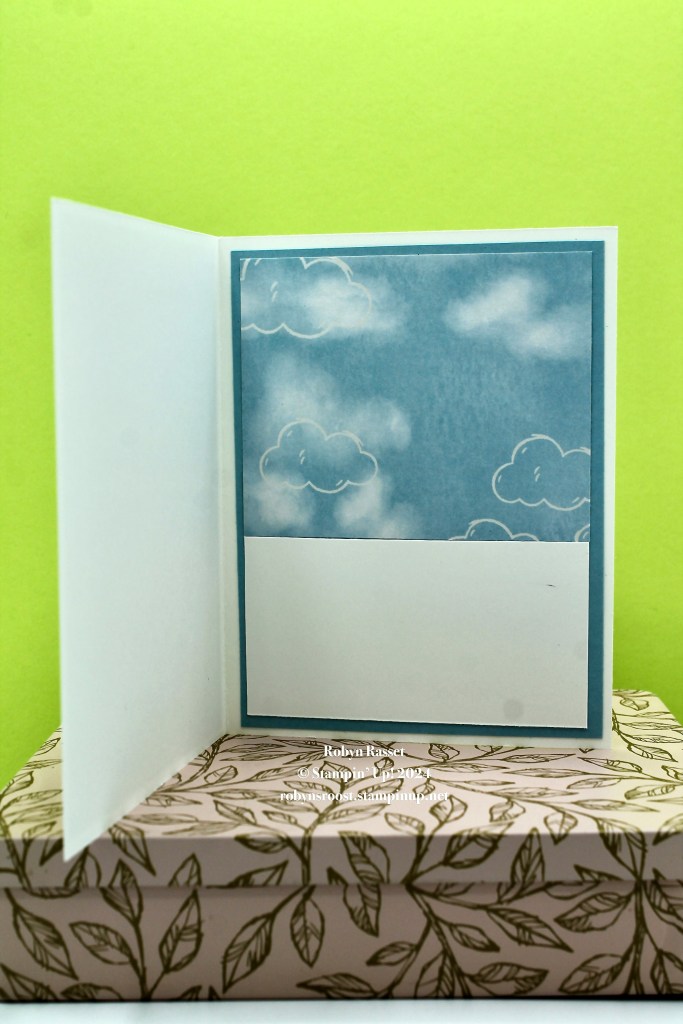
For the inside, I used the top piece of the Rain or Shine DSP from the front.
Tomorrow I’ll be sharing another card from this series and the final one will be Monday. I don’t think that I have any swap cards using this set, but I’ll find something good for Swap Card Friday.
")
|

|

|
|

|
|||

|

|
||

|

|

|

|

|

|


 Designer Series Paper")
 Designer Series Paper")


Choose the Glass Matt Studio or an extra $30 of product!