
This kit really lent itself to creating alternate card designs with the bases which were printed on both the front and the back. The pretty Happy Easter greeting led me to create several Easter cards.
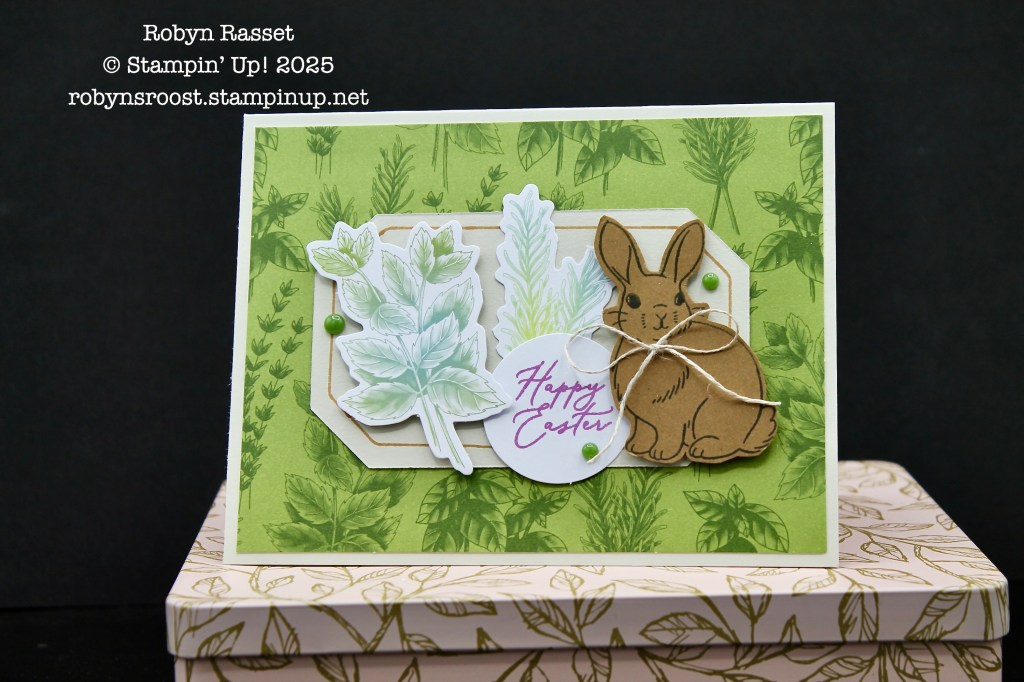
For my first card, I cut the green base into two 4″ x 5 1/4″ layers and adhered one to a Basic Beige base. I ran out of the beige labels with the pretty foiled piping so created one using Basic Beige cardstock and the Countryside Corners Dies. I held the next smaller die centered on the cut out and traced around it with a Pecan Pie Stampin’ Write Marker.
The bunny is from the February 2024 Sweet Springtime Pumpkin Kit. It is stamped with Tuxedo Black ink on a piece of Pecan Pie paper and fussy cut. The bow is the Linen Tread from the Hello Spring kit.The floral sprig on the left and the bunny are popped up with dimensionals while everything else is adhered flat.
On the inside is the sending love greeting and a strip of the green card front from the portion which was cut off.
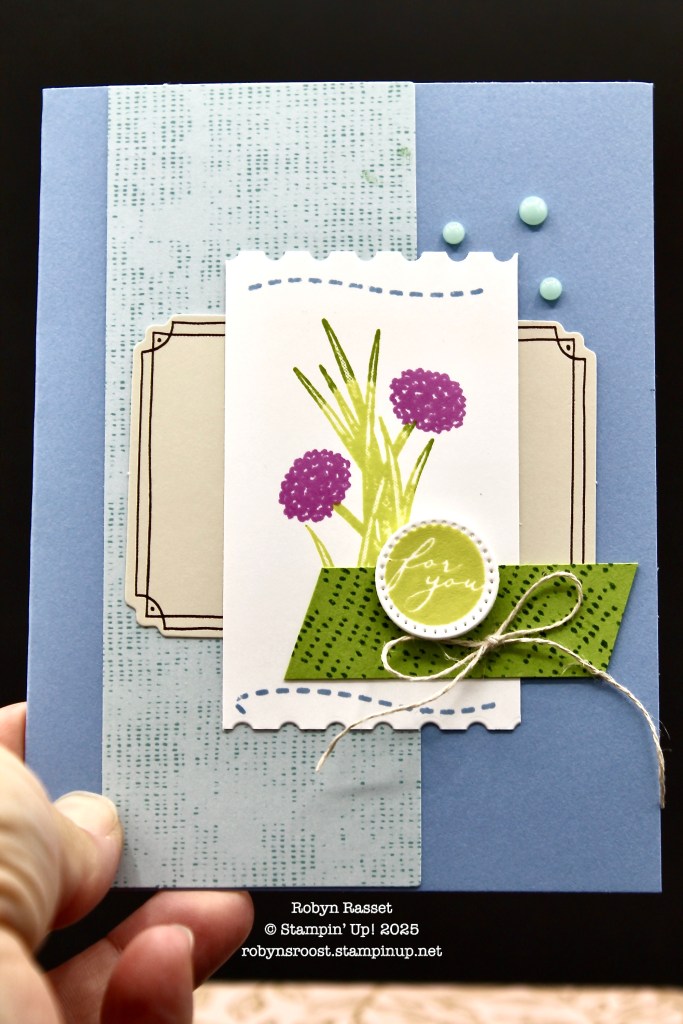
My next card used one of the blue bases, which were cut into 2 1/8″ x 5 1/2″ strips (pieces for 4 cards from 1 base). I’ve added a Balmy Blue card base. I had one of the smaller beige labels left to use on this card. I love the foiled piping. To create the white label, I started with a 2″ x 3 1/2″ piece of Basic White and cut both ends with one of the Perennial Postage Dies. I used the dotted line from the Bee My Valentine stamp set to create the stitching on the top and bottom.
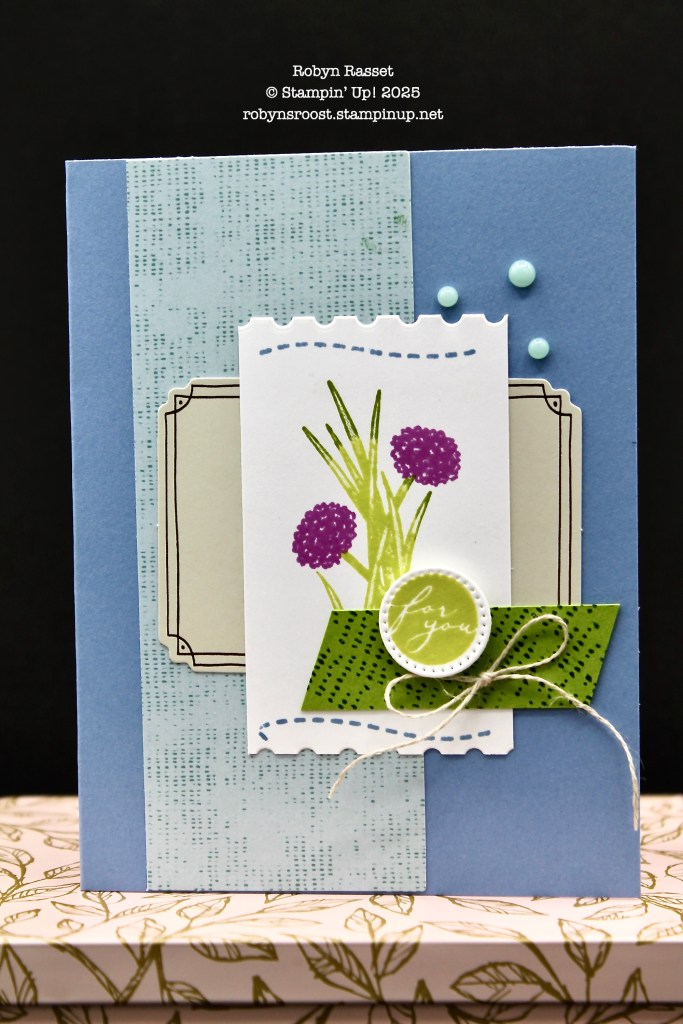
The chive greens were stamped first in Lemon Lime Twist and then the old Rock and Roll Technique was used to add Garden Green to the edges. The green strip is a piece of Granny Apple Green stamped with the background dots from the kit with Garden Green ink to look like the kit pieces which were all used up. The greeting is stamped with Lemon Lime ink and die cut with the smallest circle from the Stylish Shapes Dies. Again, a bow of Linen Thread was added using a glue dot to adhere. The gems are from the Dots for Days pack.
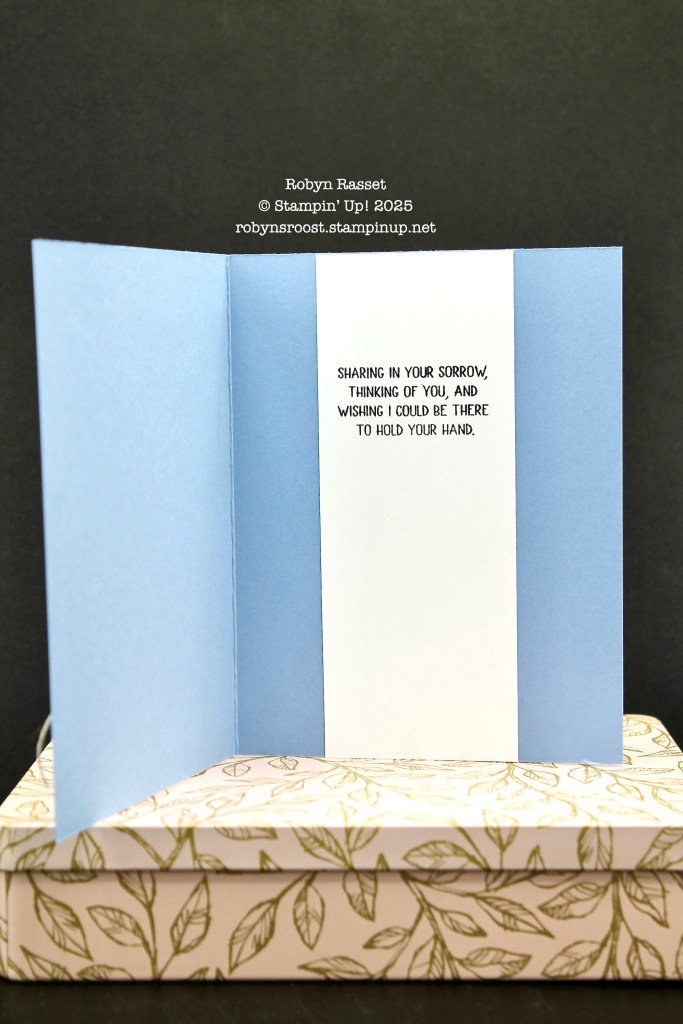
The inside white layer is also 2 1/8″ for a perfect fit for the greeting from the Bouquet of Hope February 2021 Paper Pumpkin.
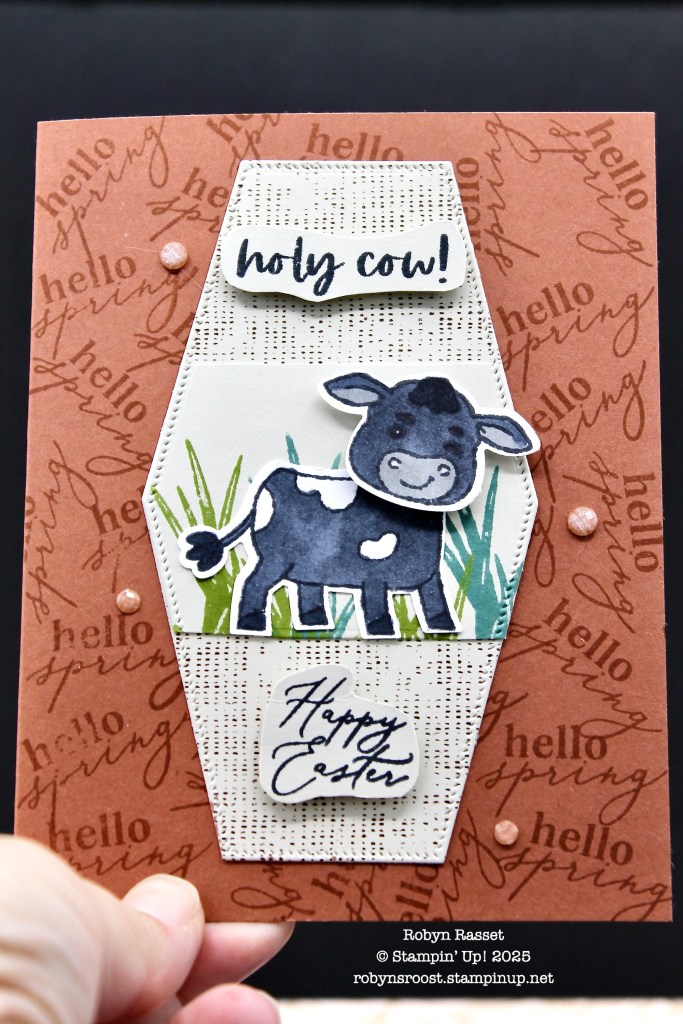
My next two cards were created with one of the beige card bases. The largest Nested Essentials Die was used to cut a layer from the center of the card base front and then used for this card. I’ve added a base of Copper Clay which has been stamped randomly with the hello spring stamp using Copper Clay ink. A 1 7/8″ x 2 3/4″ piece of Basic Beige was die cut with the same die and stamped with the top part of the chive stamp using Old Olive and Lost Lagoon ink. This layer was adhered to the die cut piece from the card base. A cow, from the Cutest Cows stamp set, was stamped and punched then colored with Stampin’ Blend Markers. She was adhered to the grass layer, the head was popped up with dimensionals.
The holy cow greeting is from the Cutest Cows set, while the Happy Easter greeting is from the Hello Spring kit. Both are done on Basic Beige with Tuxedo Black ink, fussy cut, and popped up with dimensionals.
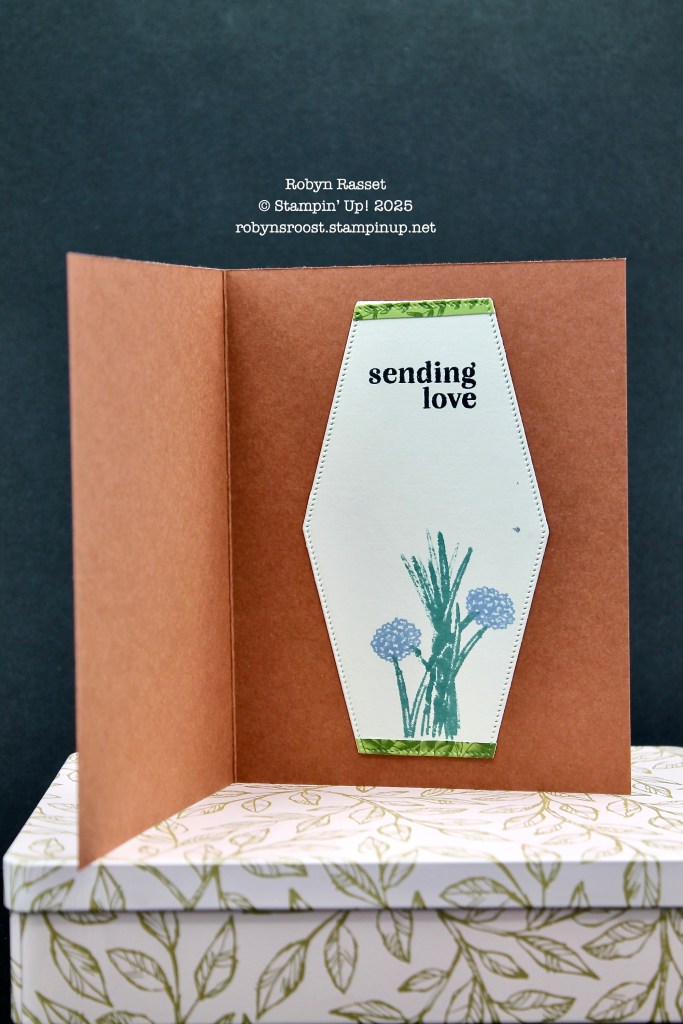
For the inside another piece of Basic Beige was die cut with the same Nested Essentials Dies and stamped.
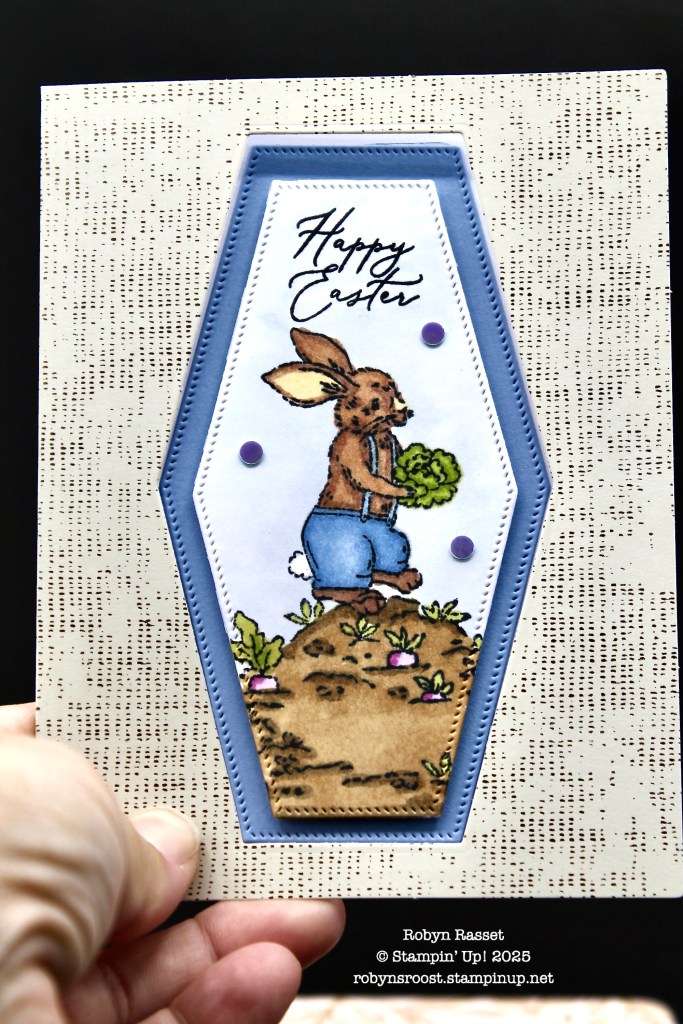
The final card was created with the base that was used for the die cut on the previous card. A second die cut was made with the same die, but in Balmy Blue, and the next smaller die was used to cut a Basic White layer.
The bunny is from the Storybook Gardens stamp set and has been colored with Stampin’ Blend Markers.
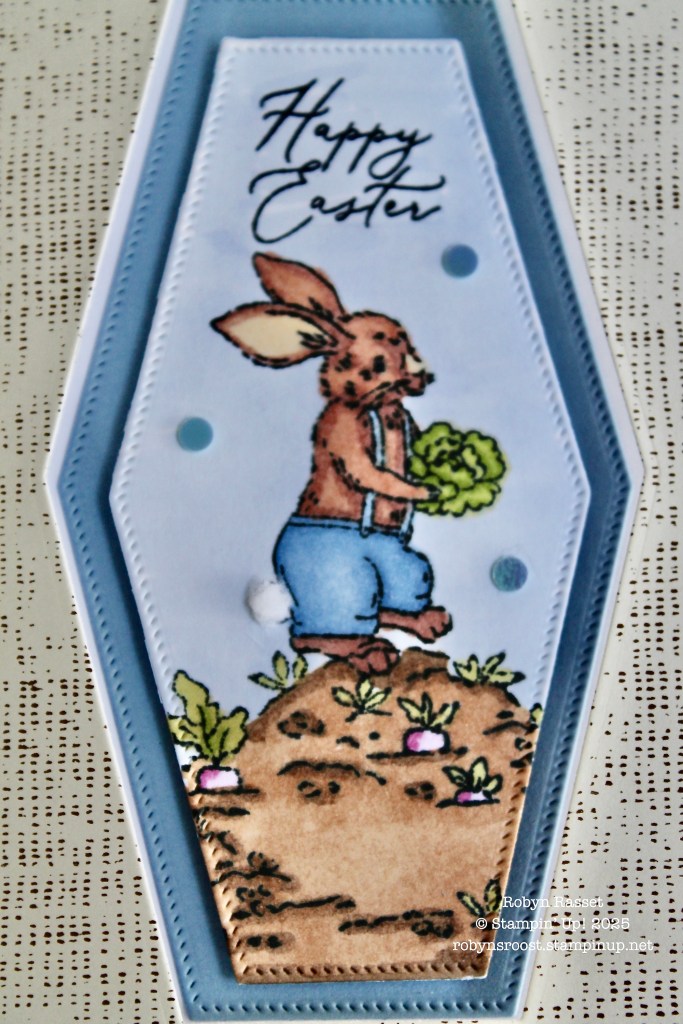
This one got a little cotton tail added, lol. We were making cards in my Quick & Cute card class yesterday and Sandy didn’t want the pom poms on the Pool Party ribbon so we saved them for bunny tails. The little Iridescent Discs are perfect on this card. The bunny layer is popped up with dimensionals so I didn’t want any thick gems on it.
I hope that this cards give you some ideas to play with. Get out that Paper Pumpkin box and start crafting! If you have any questions about how I did something or about a product I used, please ask.
Product List

|

|

|
|

|

|

|

|

|

|
||

|

|

|
|

|
|||

|

|

|
|

|

|

")
")


