
When I ordered the Easter Friends stamp set, I knew that the animal images were really cute, but when I actually stamped with them, WOW! The images are AWESOME!
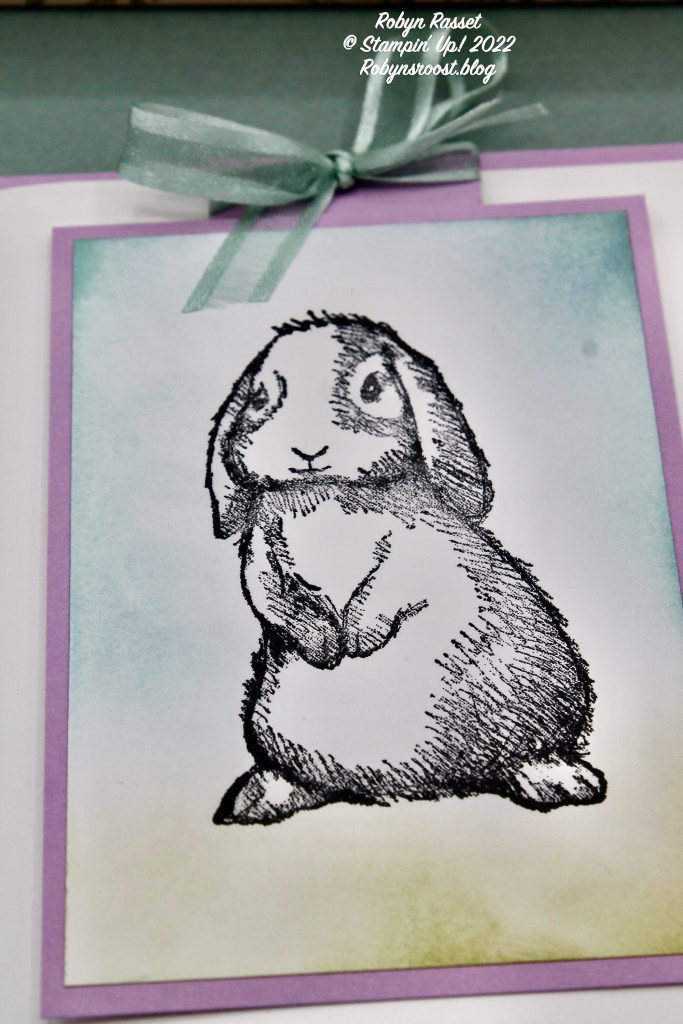
This bunny almost hops off the paper! Rather than adding color to the bunny, the background is colored using Blending Brushes. Now, to explain this awesome fun fold. You have to give this a try! It is so simple! Just 6 pieces of cardstock. Thank you Susan Burch for teaching me this fun fold.
Paper Dimensions:
- Colored Cardstock
- 5 1/2″ x 4 1/4″
- 1 1/4″ x 5 1/4″ Scored at 1 1/2″
- 3 1/4″ x 4 1/2″
- Basic White Cardstock
- 8″ x 5 1/4″ Scored at 4″
- 2 pieces 3″ x 4 1/4″
Assembly:
- Adhere the narrow scored strip to the top (or side if desired) of the 5 1/2″ x 4 1/4″ base. I like to adhere it to the inside of the card but this is just preference.
- Adhere the folded white card to base with the flap attached.
- Adhere the front image to the 3 1/4′ X 4 1/2″ colored cardstock. Then add a small amount of liquid glue on the edge of the flap and center this piece where desired on the flap.
- Lift the flap and adhere the other 3″ x 4 1/2″ image to the inside of the flap.
- Add a ribbon to the flap if desired.
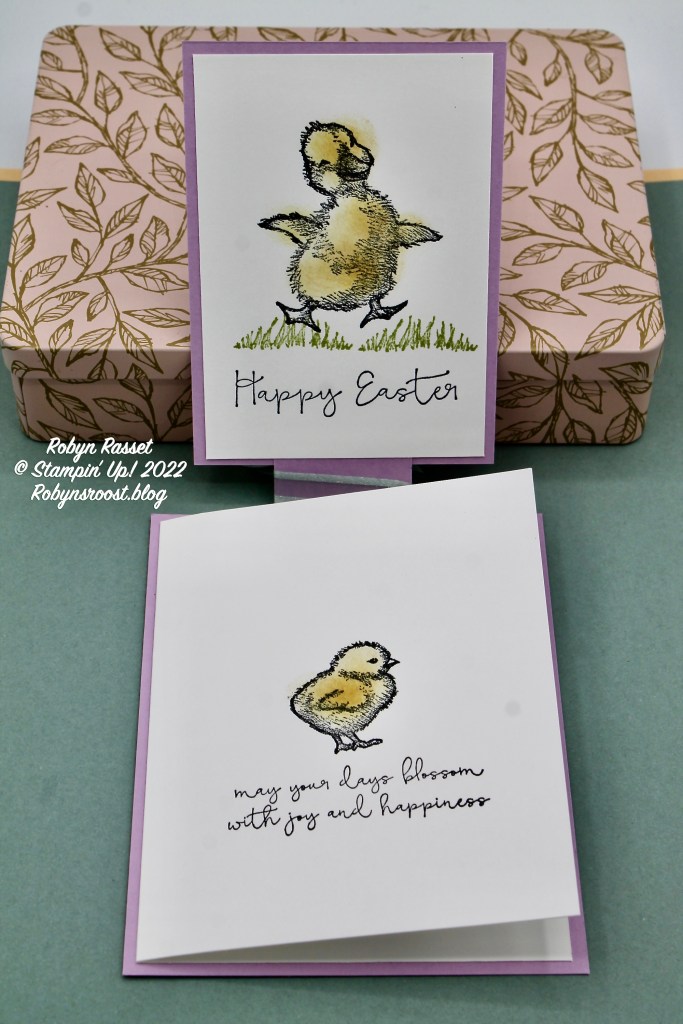
Lift the bunny flap to reveal a duckling on the back side of the bunny and a baby chick on the front of the folded white card.
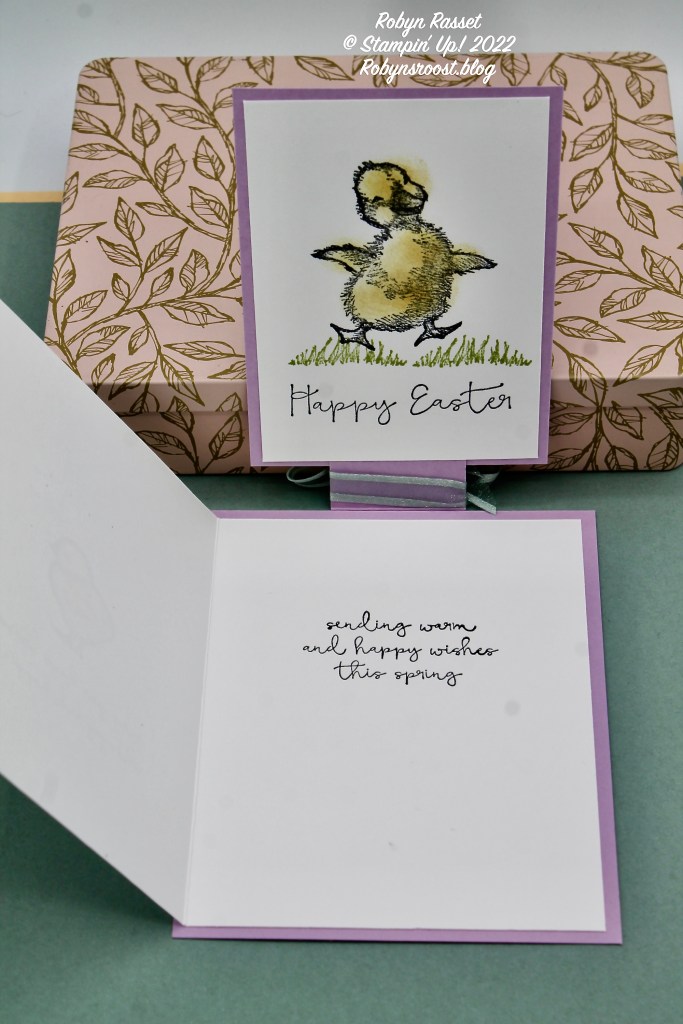
Open the folded card to reveal a greeting and a spot for a little personal note.
To watch this card being create see my Easter Friends Add A Flap Video Tutorial. Isn’t this just the cutest card? I know that you will be seeing more designs using this layout here on my blog. My mind is already spinning with ideas. What are you thinking about adding to this design to make it unique?
Product List
")


 Open Weave Ribbon")
