
Recently I participated in a fun stamping activity during a Zoom Meeting. Before the meeting we were given a list of card parts to cut and gather. Then we were given instructions as to stamping and glueing but didn’t get to see what the card was supposed to look like.
Here is the parts list that we had:
___Stamp Set or Bundle
___Designer Series Paper (two of 1″ x 4″)
___Whisper White (or Very Vanilla) (4″ x 5-1/4″)
___Coordinating card base (5-1/4″ x 5-1/2″)
___Whisper White (or Very Vanilla) (3-3/4″ x 3″ – this is the layer that will be stamped with a sentiment &/or decorative stamps &/or die cut shapes – using stamp set or bundle)
___Coordinating layer 4″ x 4″
___Coordinating Ribbon
___Coordinating Embellishments (optional)
___Adhesive, Bone Folder, Scissors, etc
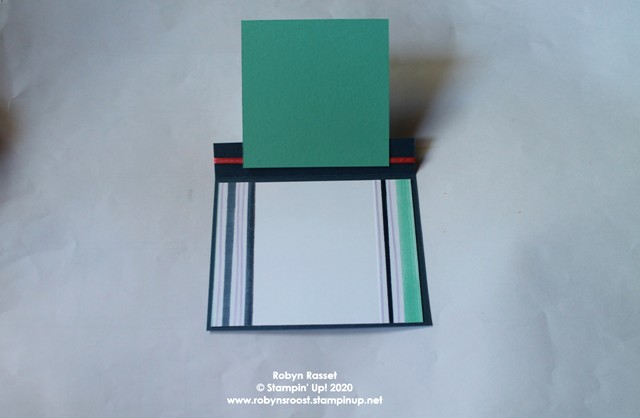
Direction #1: Score at 4-1/4″ along the 5-1/2″ side, end size when folded is 4-1/4″ x 5-1/2″ – with a 1″ flap. This is the cardbase.
Direction #2: Tie the ribbon around the 1″ flap. Bow or knot, your choice.
Direction #3: Adhere the 1″ strips of DSP to the ends of the white 4″ x 5-1/4″. Adhere this to the inside of the cardbase. The card will be in the landscape orientation.
Direction #4: Stamp the greeting and images on the 3-3/4″ x 3″ piece of whisper white. This piece is also in the landscape orientation. Adhere to the 4″ x 4″ cardstock piece.
Direction #5: Adhere the 4″ x 4″ piece to the inside of the fold over flap on the cardbase with Tear and Tape. Be sure to line up the bottom edge with the bottom of the cardbase.
Here is the card that I ended up with.

Feel free to play this game with your friends! See what everyone ends up with.
Product List
")
|
|

|


 Designer Series Paper")


