
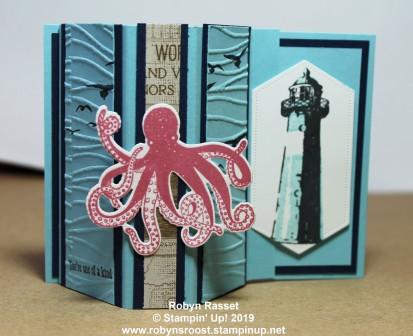
This fun card technique is actually easier than it looks. The friendly octopus from the Sea of Textures stamp set makes a great focal point and the light house from the High Tide set makes a great background complement. The Balmy Blue color gives a soft watery background for the octopus.
Here are the directions for completing the card.
- Cut 2 pieces of Balmy Blue 4 1/4″ x 5 1/2″. One will be the cardbase the other will be the swing out piece.
- Cut a piece of Night of Navy 4″ x 5 1/4″ and adhere to the cardbase. Cut a piece of Balmy Blue 3 3/4″ x 5″ and adhere on top of the Navy piece. Set aside.
- Score the Swing Out piece at 1/2″, 2 1/4″, 3 1/4″, and 5″. Cut 2 pieces of Night of Navy 1 1/2″ x 4 1/2″ and one at 3/4″ x 4 1/4″ and adhere onto the appropriate places on the swing out panel.
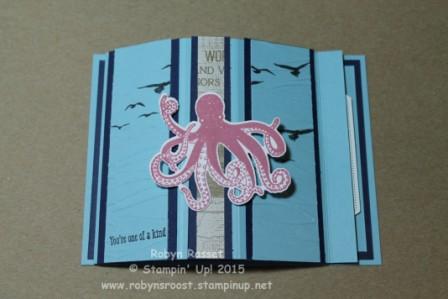
- Cut a piece of Balmy Blue 2 1/2″ x 4 1/4″. Emboss with the Seaside (or High Seas) Embossing Folder. Cut in half so that you have 2 pieces that are 1 1/4″ x 4 1/4″. Stamp the flying gull and the greeting with Tuxedo black and adhere to the swinging panel.
- Cut a piece of the newsprint design Come Sail Away DSP 1/2″ x 4 1/4′ and adhere to the center of the Swing Out piece.
- Stamp the Octopus with Rocco Rose ink onto whisper white paper. Stamp the outline of the lighthouse with Tuxedo Black and the solid color stamp with Balmy Blue. Cut out the Octopus with the matching Under the Sea Die and the Lighthouse with the Stitched Label Die that fits it.
- Adhere the Swing Out Pane to the cardbase using Tear n Tape on the tab that was created by the score line. Line it up with the Night of Navy layer.
- Be careful when adhering the Octopus to the narrow front panel piece so that when the card opens he is only attached to the center and doesn’t stick to one side.
- Using dimensionals adhere the lighthouse to the right side of the cardbase. Place the dimensionals in the center of the lighthouse piece so that the tab from the Swing Out piece can slide under the lighthouse to hold it open.
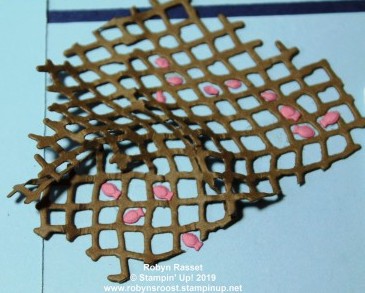
- If desired, cut out a net of Soft Suede with the Under the Sea Dies and some fishes of Rocco Rose. I had to add the fishes to cover up my glue globs. I scrunched up the net and adhered it with snail but I would suggest using the Fine Tip Glue Pen to avoid the glue globs.
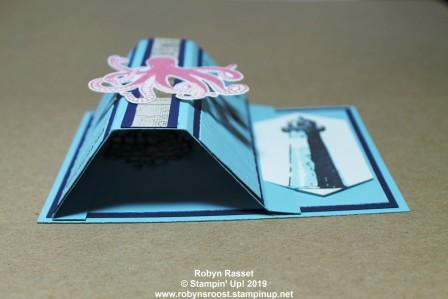
The photo above shows how the flaps are positioned to hold the swing out portion in place.
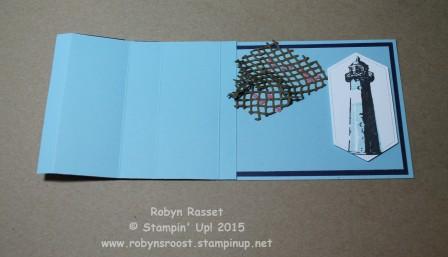
I crumpled the net and then ran snail onto it to attach to the card, but the snail wasn’t a good idea. I ended up with glue that was sticky and visible. I would suggest liquid glue instead. To cover up my glue globs, I cut out some of the little fish and added them to the net. Here is a close up of the net.
If you like this card, you can purchase the supplies from store by clicking on the links below.
Product List

|

|
|

Seaside Textured Impressions Embossing Folder
[141481]
$8.50
|

|

|

|

|

|


