
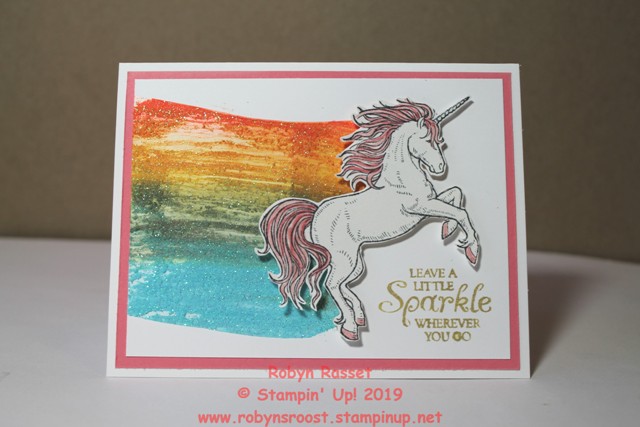
I’ve wanted to try this technique since I saw it done by Sara Douglas, CEO of Stampin’ Up! at OnStage in Orlando over a year ago. It was a bit messy and took some time but I do like the card. I was a bit unhappy with the way the green color turned a bit drab and I don’t think I would use green in the rainbow if I did another card like this.
To start I stamped the unicorn on a piece of 4″ x 5 1/4″window sheet and on a scrap of whisper white. On the white unicorn I colored the main, tail, hooves and horn in pinks. Then I fussy cut the entire unicorn. On the window sheet unicorn, I cut out a chunk from behind the unicorn (where the rainbow sits) following the outline of the back side of the unicorn. This is the mask for adding the shimmery embossing paste.
Mix about a teaspoon of shimmery embossing paste for each color. Mix in a drop or two of re-inker and stir with the paste knives. I used a red, orange, yellow, green and blue. Hold or tape the window sheet mask onto a piece of whisper white cardstock 4 ” x 5 1/4″. Place the glops of colored embossing paste on the mask at the edge of the cut out spot. Use a piece of stiff cardboard (like from a Paper Pumpkin Kit) and pull the embossing paste across the mask.
Be sure to cover your work area and clean up your tools as soon as possible. Set the piece aside to dry completely before assembling the card. When dry, stamp the greeting, add the unicorn with dimensionals and layer onto a piece of Flirty Flamingo cardstock, then adhere to the cardbase. I used Gold Wink of Stella to ink the greeting stamp but a gold ink pad would also work, or regular ink of another color.
Product List

Tempting Turquoise Classic Stampin’ Ink Refill
[101041]
$3.75
|
|

Gold Wink Of Stella Glitter Brush
[141898]
$8.00
|


