
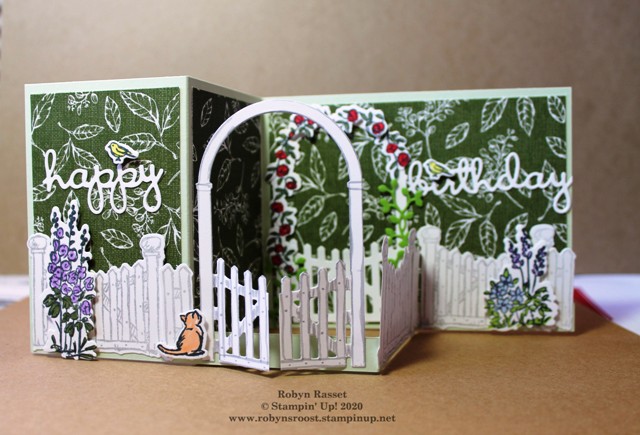
I’m so ready for the sight of green, growing things when I step outside! Making this card almost made me forget that everything is all white and frozen outside here in Minnesota right now. This card is a little busy and is definitely NOT a quick and easy card. We did this card at Creative Cards Class last night. We actually had to reschedule the class from last week because of our wonderful blizzard conditions. (See why this card was sooo necessary for my anti-depression treatment)
Directions:
1. Score a piece of Soft Sea Foam Cardstock at 2 3/4″ and 5 1/2″ on the long side. Cut at 4 1/4″ on the short side. Then cut off a 1/2″ wide strip from one half. (Keep this piece to make more strips for additional cards.) Fold the other full half on the score lines to create the card base.
2. Cut 3 pieces of the desired designer series paper – 2 pieces at 2 1/2″ x 4″ and one at 5 1/4″ x 4″. Adhere these to the card base, all on the same side.
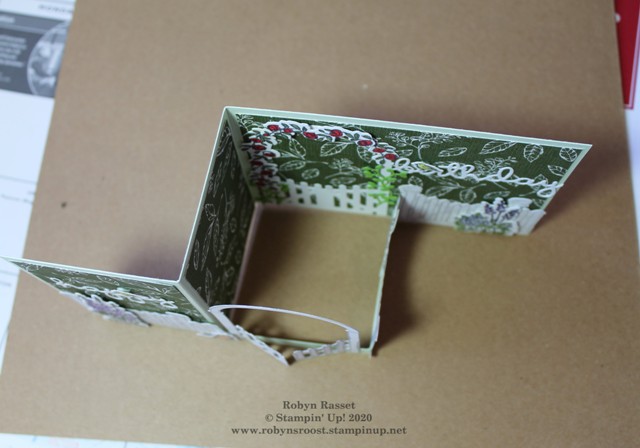
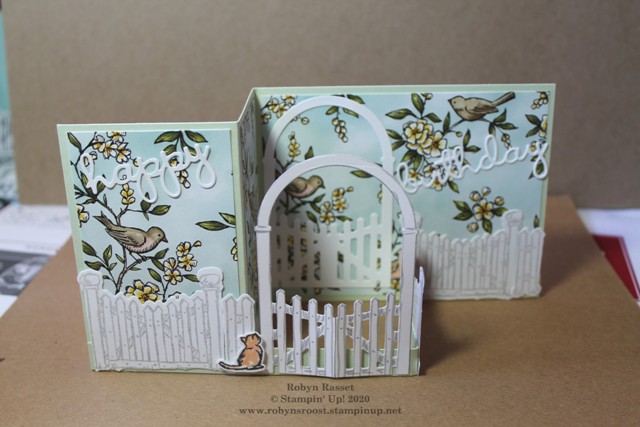
3. Next, take the 1/2″ X 11″ strip and fold on the score lines. This is going to get adhered along the bottom of the card base. Just remember that the scores are going to be opposite of the main card base. The long part will get adhered to the short scored part of the main card. Lay the card open on the table and add a strip of liquid glue to the right of the first score 1/4″ from the bottom. Lay the 1/2″ strip with the longest un-scored portion onto the glue. Line up with the edge and bottom. Now put glue on the back of the strip from the last score line to the right edge and adhere to the right corner of the cardbase, again lining it up with the bottom and the edge. It will form a box like in the photo above. Now you have the base complete and it’s decorating time!
4. Stamp 3 of the fence pieces with the balls on the top and 3 of the 2 board fence pieces, on whisper white paper, with smoky slate ink. Cut out with the matching dies from the Garden Gateway Dies.
5. Stamp on the back of one of the large fence pieces. The back of this piece will be visible when the card is closed and looks nicer if stamped.
6. Now cut 2 of the fence gate archways from whisper white paper. On one of them use the Smoky Slate Stampin’ Write Marker to outline the boards so that they match the stamped fence pieces. The other is optional, as it is in the background.
7. Cut a slit 3/4 of the way thru the archway fence to start making a swinging gate. Leave the last bit until the card is finished to make it square up easier. This part is optional as well, it makes the gate “open”.
8. Start adhering the fence on the left side of the card. Use either tear n tape or liquid glue. Adhere it to the small 1/2″ strip that you attached to the bottom of the card. Snip off the bits of grass on the bottom of the fence if desired. Start with the big fence piece and add in the 2 board piece next to it. Then add the arch. Remember if you want the gate to open, only add glue to the outside posts. Turn the corner and now add the large fence piece that is stamped on both sides. Attaching just to the narrow strip, then add the small 2 board piece. Turn the corner and continue with the final large fence piece and final 2 board fence piece.
9. Now snip the remaining 1/4 of the gate so that it can swing open and carefully fold back the gate pieces. Add a small amount of liquid glue to the remaining archway and place behind the open archway gate on the card base. I left this gate closed.
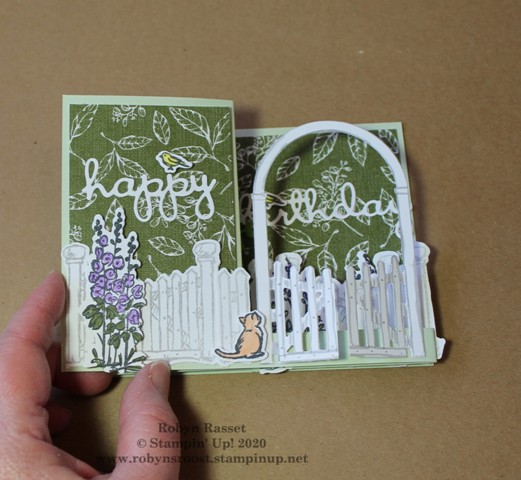
10. Add the happy birthday die cuts from the Well Said Dies in either white or black. Add additional decorative flowers, birds and cat as desired. Use dimensionals to pop up the accessories as desired.
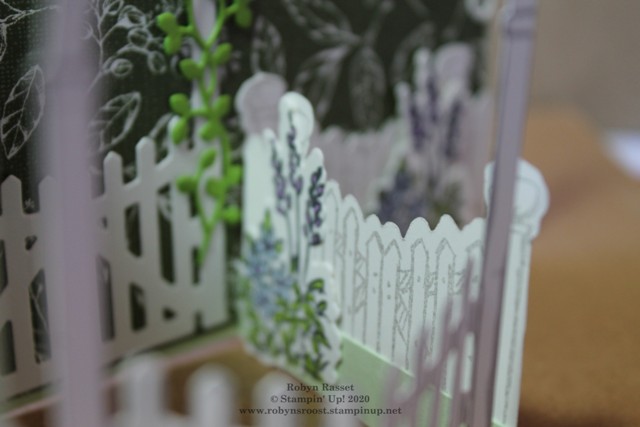
This photo shows the stamped inside of the fence, looking through the front archway gate. Notice a bunch of flowers have been added inside against the fence.
Here is a view of the card as it looks when closed and ready to go into the envelope.
This card uses the Bird Ballad DSP and doesn’t have any flowers around the fence.
Selecting a featured im
If you would like to duplicate this card and need to purchase the supplies, click on the links below. Remember that until March 31 earn a free product from the Sale-a-bration catalog with each $50 order.
Product List
")
|
|

|
|

|
|

|
|

|
|

|
|

|


Just wondering what size paper you started with , starting the scoring? Does this make the regular size card the 8-1/2 5 1/2?
LikeLiked by 1 person
Hi Kelly, Start with a piece of cardstock that is 4 1/4″ x 11″. Score at 2 3/4″ and 5 1/2″. When finished the closed card is 4 1/4″ x 5 1/2″ and will fit in a standard envelope.
LikeLiked by 1 person
Robyn, where does the fourth large fence piece go?
LikeLiked by 1 person
Hi Betty,
I’m afraid that was an error. If you stamp on both sides of the one fence piece you only need 3 of them. I think that I originally glued the 2 together but decided that I liked the look of stamping on the back instead.
Robyn
LikeLiked by 1 person
Like!! Great article post.Really thank you! Really Cool.
LikeLiked by 1 person