
Today I’m sharing more cards made with the Hallows Night Magic. For these cards I decided to do some sponging. I’ve used Blackberry Bliss in on the top portion and Cajun Craze on the bottom. These are some of the colors that are in the coordinating Magic in This Night Designer Series Paper.
The sponges come as a big round circle and I like to cut them into pie shaped pieces. Usually in 1/4 or 1/8 pieces. When sponging, I first daub the sponge onto an ink pad to pick up the ink, then I like to start laying down the color just a bit off of my paper and use circular motions to add the color. I use old desk calendars to protect my work table. It’s always best to start light and add more color until it reaches the desired darkness. Once it’s too dark, it’s time to start over. Where the two colors meet, I like to rub the lighter color into the darker one.
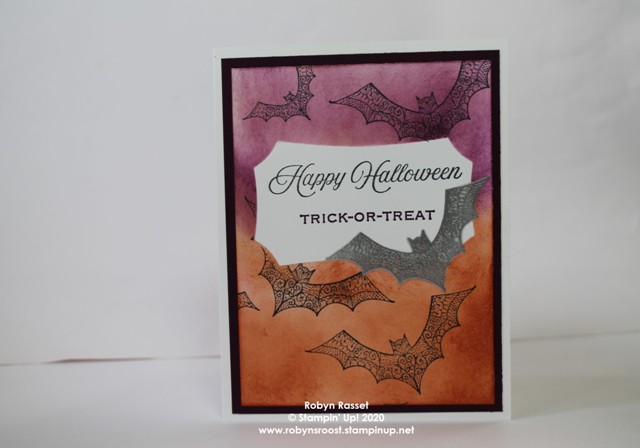
I made a mask using post it notes and the label die from the Halloween Magic Dies. For the top card, I stuck the label shaped mask onto a 4″ x 5 1/4″piece of whisper white cardstock and sponged around the mask, leaving the label mask area white to stamp the greeting.
After sponging but before removing the mask, I stamped the black bats onto the sponged piece. Some are sponged off the edges and some are stamped over the mask.
I also stamped a set of the bats with VersaMark ink onto a piece of vellum cardstock and heat embossed them with silver embossing powder. I actually hand cut them rather than using the matching die because I wanted them cut right up to the bat without a border. I then used one of the bats on each card.
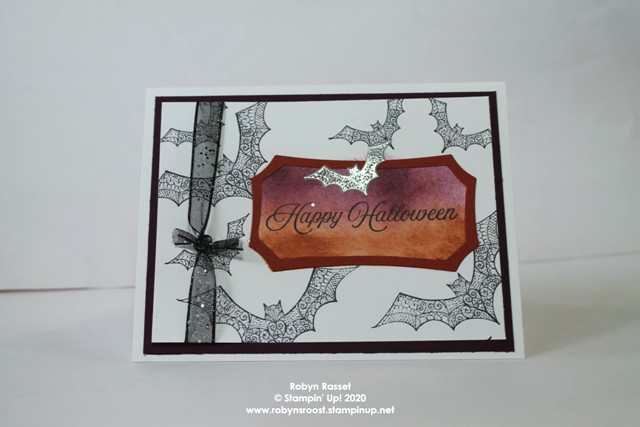
For the second card, I used the outside scrap piece that was left of the post it note after removing the label mask. I then used the same sponging technique on the area inside of the mask and also stamped black bats around it. I wasn’t happy with the way the edges around the sponged area turned out. They were a bit fuzzy, not sharp. I decided to die cut a label to make a frame around the edge of the masked label area. To make the frame I die cut the label from Cajun Craze cardstock and then poked a hole in the center with my paper snips and cut out a circle from the middle. Next, I carefully cut all the way around the piece leaving only a narrow frame. I used liquid glue to adhere over the sponged area. When I use liquid glue, I also like to use a silicone sheet to work on. That way if I slop glue over the edge of my piece it doesn’t land on my work space and when I’m done gluing I just move the silicone sheet off the table. Most glue will pop right off the silicone sheet once it’s dry, simply by rolling the sheet.
I then added the smaller vellum and silver bat to this card. For this card, I also added a piece of the Black Glittered Organdy Ribbon tied with a knot. I cut this piece down to 3 3/4″ x 5″ and then layered it onto a piece of Basic Black that is 4′ x 5 1/4″.
Oh, one more note about the vellum bats, adhesive does show through the vellum so on these bats, I covered the entire back with Stampin’ Seal so that it would all look the same.
Hope these cards give you some inspiration to make some creepy Halloween fun!
Product List for items used in making these two cards.


 Glittered Organdy Ribbon")


")
