

I’ve been so busy working on fall and Christmas cards and projects that I haven’t done any birthday cards for quite a while. A few months ago I shared a card using this technique, but I thought that this card was pretty enough to share the technique again.
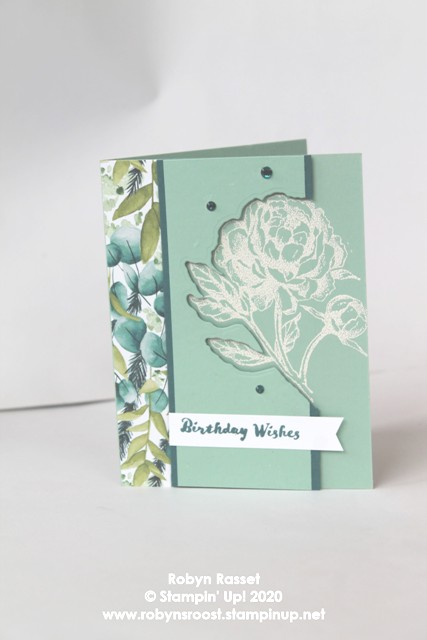
Directions for the Partial Die Cut Technique
1. Stamp the Image with VersaMark onto the cardbase. Sprinkle with White Embossing Powder and heat set.
2. Cut a piece of cardstock 2 3/4″ x 5 1/2″ and a piece the same color as the card base to 2 1/2″ x 5 1/2″ and adhere together. Stamp the greeting with Tuxedo Black about an inch from the bottom. Or add as a tag.
3. Place the layered pieces from step 2 over the image, centering on the card base. DO NOT ADHERE YET! Position the Die so that it lines up with the image. Use a piece of removable tape to hold the die in place. Move to a die cutter plate and cut with die machine.
4. Cut a 3/4″ x 5 1/2″ piece of patterned paper and adhere to the folded side of the cardbase.
5. Use dimensionals to adhere the die cut piece to the card, lining up with the image on the card.
Product List: Please Note that the Forever Greenery Paper is on SALE during the Month of October for only $9.78. Be sure to get 2 packs to stock up!
")


")


