

We’ve add an extra Inspiration Hop this month to get in some more fun Fall Themed ideas. I love decorating for Halloween and hosting Halloween parties. I don’t care for the really scary decorations or costumes though, I tend more towards Casper the friendly ghost than the Grim Reaper.
The card that I’m sharing today is actually a card that we will be making at Creative Cards Class on Wednesday. I don’t usually share these cards before class, but I have two of my grandsons here this weekend and I’m hoping that I have time to get this post done, let alone make a card. A 2 year old and 4 year old sure do have more energy than this grandma! I love to spend time with them but they do wear me out.
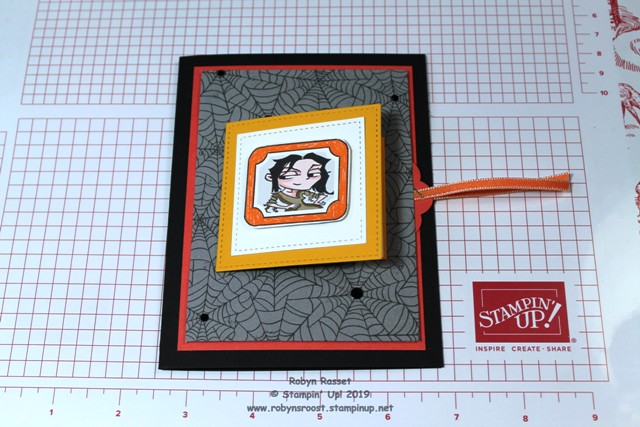
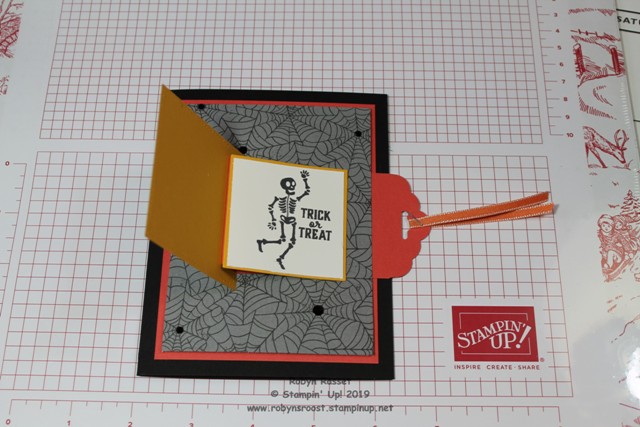
So, for this card technique, when I saw several of these on Pinterest, I immediately thought of the Monster Bash Designer Series Paper portraits. I think these portraits are just so stinkin’ cute! I even thought about having a real person’s photo on the front and one of the Monster Bash portraits on the inside. But, for this card, I put the portrait on the front and used the Bone Appetite Paper Pumpkin Kit stamp set for the inside.
I think that I may switch up the Terracotta Tile and Crushed Curry cardstock colors for class on Wednesday. Sometimes my first try isn’t exactly what I had in mind. I’m thinking of switching the Terracotta to Pumpkin Pie.
Each person who attends my Creative Cards Class get a direction and supplies sheet for each of the 3 cards that we make. That way they have the dimensions and supply list to recreate either more of the same card or different cards using the same technique. Here are the directions for the Pull Tab Flip Flap Card:
1. Start with a standard 8 1/2″ x 5 1/2″ basic black card base scored at 4 1/4″.
2. Cut a piece of the Monster Bash DSP 3 1/2′ x 4 3/4″. Use the Classic Label Punch slide it as far in as it goes on the long side and center it. Punch a slot.
3. Cut a piece of Terracotta Tile cardstock 3 3/4″ x 5″ for a matt but do not adhere it yet.
4. For the pull, cut a piece of cardstock 2″ x 6″ and score at 2″ and 2 1/2″. On the long side punch the end with the Scalloped Tag Topper Punch.
5. Using the Stitched Shapes Dies Squares cut the following: 1 Crushed Curry from the largest square, 1 Crushed Curry from the next largest square, and 1 of whisper white. Next cut a white square 2″ square. Do the stamping and layer the squares.
6. Push the scalloped edge thru the slot and fold over the scored line. Attach the small square to the short side of the pull tab, so between the non-scalloped end and the score line. Put a strip of tear n tape on the narrow section between the score lines and adhere the large square to this strip. Put tear n tape on the end of the small square. Center on the card and press.
7. Use dimensionals to adhere the DSP layer onto the mat. Be sure to avoid placing dimensionals in the pull tab area.
8. Add a piece of ribbon to the scalloped tag topper hole. Adhere the mat to the card front.
9. Place a 5″ x 3 3/4″ piece of white paper on the inside of the card and stamp greetings and images as desired.
Be sure to check out more Stamping with the STARS inspiration (#DOswts324):
| 1. | Dawn Thomas | |
| 2. | Robyn Rasset | |
| 3. | Dawn Olchefske | |
| 4. | Cathy Peck | |
| 5. | Elaine Christensen |

Product List


Fun card Robyn…thanks for the instructions. Will have to give it a try! Glad to have you Stamping with the STARS #DOswts324!
LikeLike
Awesome card. Are you going to make a how to video?
LikeLike