

The Give It A Whirl Dies are show in the Annual Catalog on page 57 with the Stellar Birthday stamp set. Although they are shown together, they are not a bundle and the dies don’t cut out any of the stamped images from the Stellar Birthday set. The Stellar Birthday stamp set does work perfectly with the Give It A Whirl Dies but don’t stop there! The Turtle stamps work great too! Any stamp set with images that will fit in the window cut outs will work.
The circle base for the spinner was created by gluing strips of the Ombre Specialty Paper onto a piece of Basic White card stock and then die cutting the circle. These Give It A Whirl dies make creating this spinner card so slick and easy! All of the pieces line up with holes for the brads.
After I was done cutting out the spinner circle, I had some corners left of my rainbow strips so I die cut some of the stars and dots that are also dies in the Give It A Whirl set. These were scattered all over the front after everything else was completed.
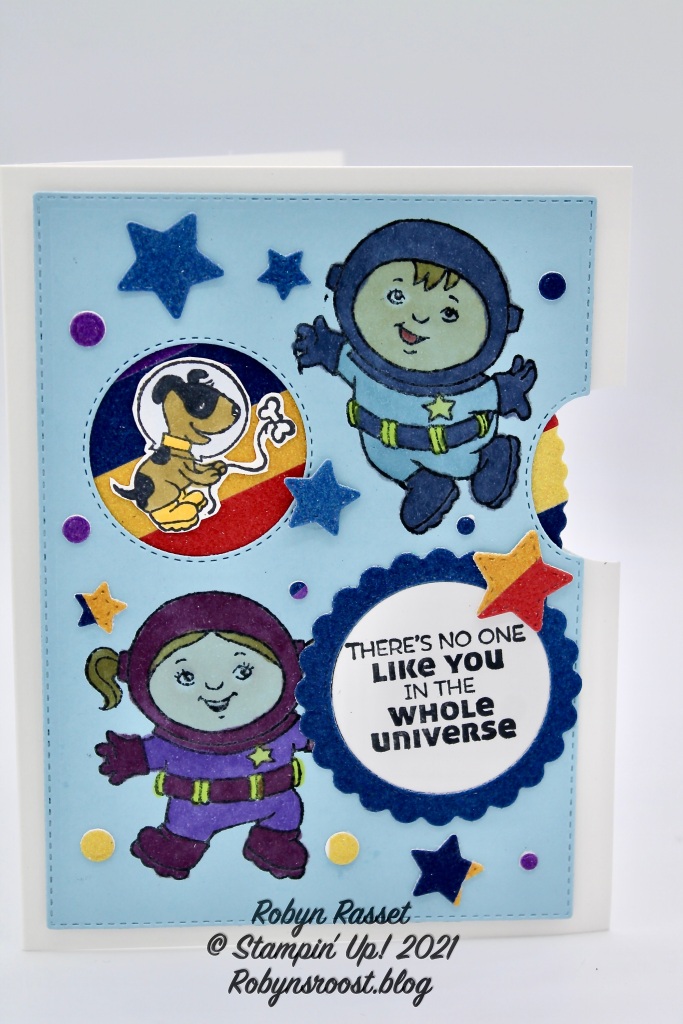
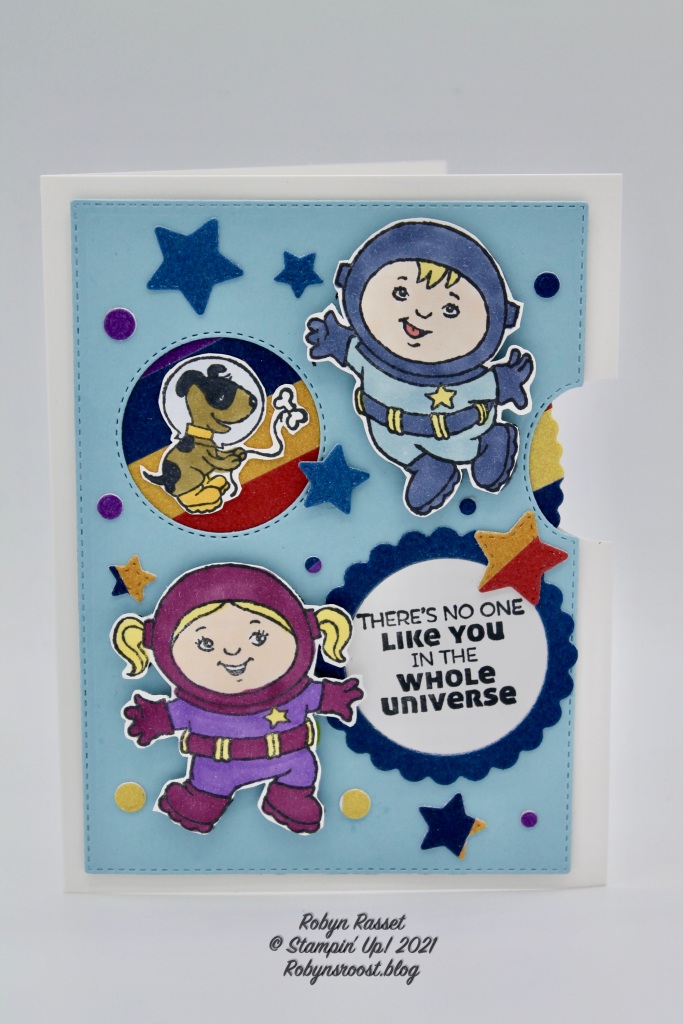
I first stamped and colored the astronauts directly onto the Balmy Blue die cut layer. I colored them with Stampin’ Blends which is a bit tricky because the Stampin’ Blends work best on the Basic White card stock which has a smoother finish. With the colored card stock, the Blends tend to spread and bleed into the paper and don’t stay in the lines. By coloring from the center out and staying away from the lines, it can work. Once I looked at the pictures of the card, I just didn’t like the way the colors looked so I decided to re-stamp them on Basic White card stock and then fussy cut and adhere. I was trying to avoid having to fussy cut, but they looked much better on the white.
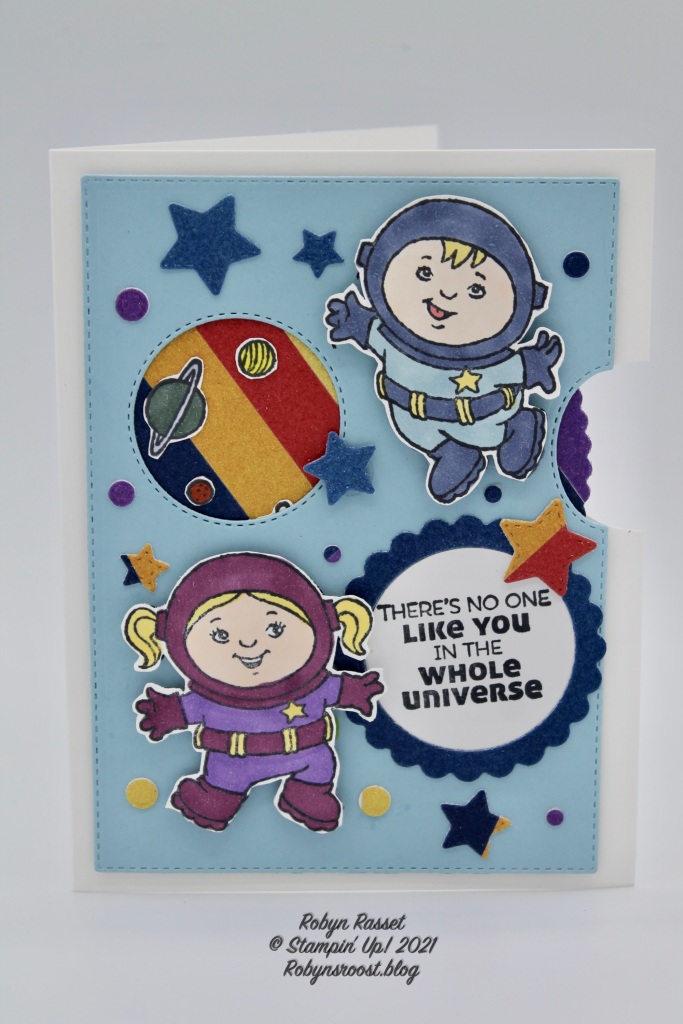
The greeting is stamped on Basic White with Tuxedo Black in and die cut with another of the Give It A Whirl Dies. The die, cuts out the inner circle, and the outer, scalloped circle in two pieces, so I cut a second one out of the Ombre Specialty Paper to use as a frame.

I did use a 1 1/4″ Circle Punch to punch a notch in the card front so that it was easier to move the spinner. For placement of the notch, I placed the layer onto he card front and used a pencil to mark where I wanted to punch the circle. Then removed the layer and did the punching.
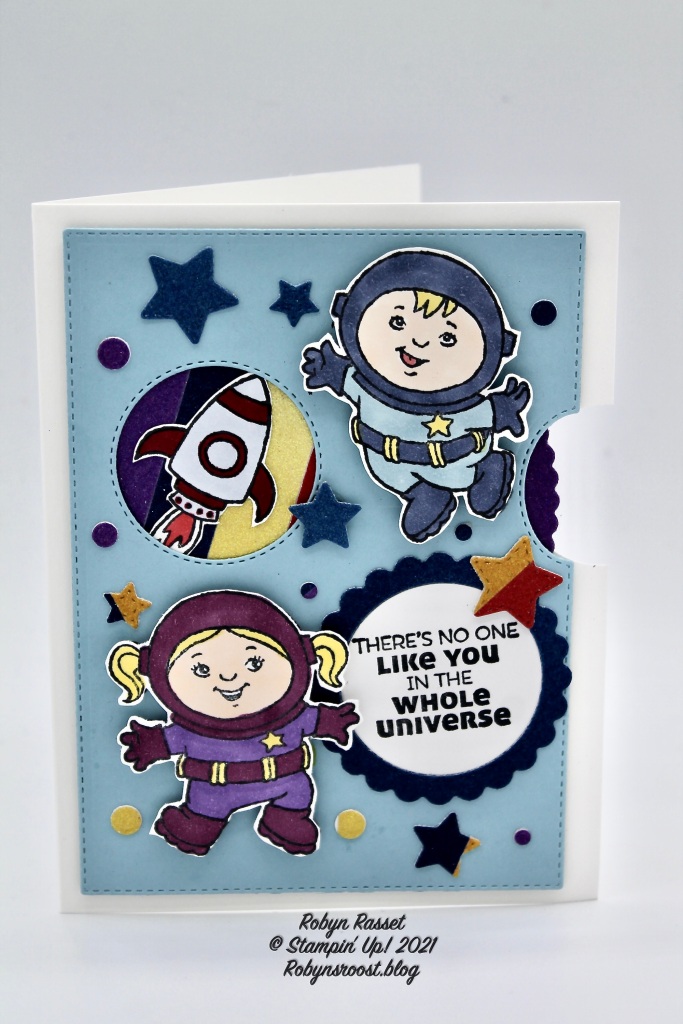
I did stamp all of the images for the spinner window onto a piece of Basic White card stock, colored them with Stampin’ Blends and then fussy cut them. Be sure to adhere them down good so that they don’t catch when the wheel is spun.
Products Used on this card – just click on the links to purchase.


 Specialty Paper")


